
Secure Boot Setup Guide
This guide will help you check whether Secure Boot is enabled on your PC and provide the necessary steps to enable or troubleshoot it if needed.
1.Refer to the illustrated guide below to enable Secure Boot.
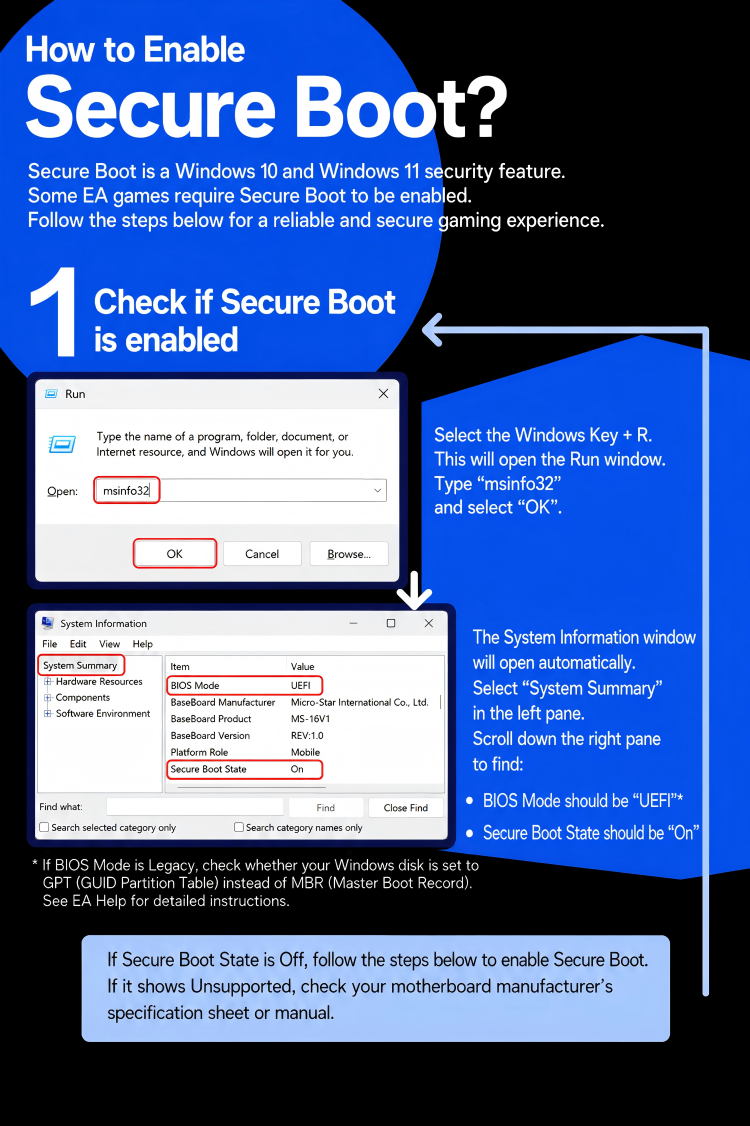
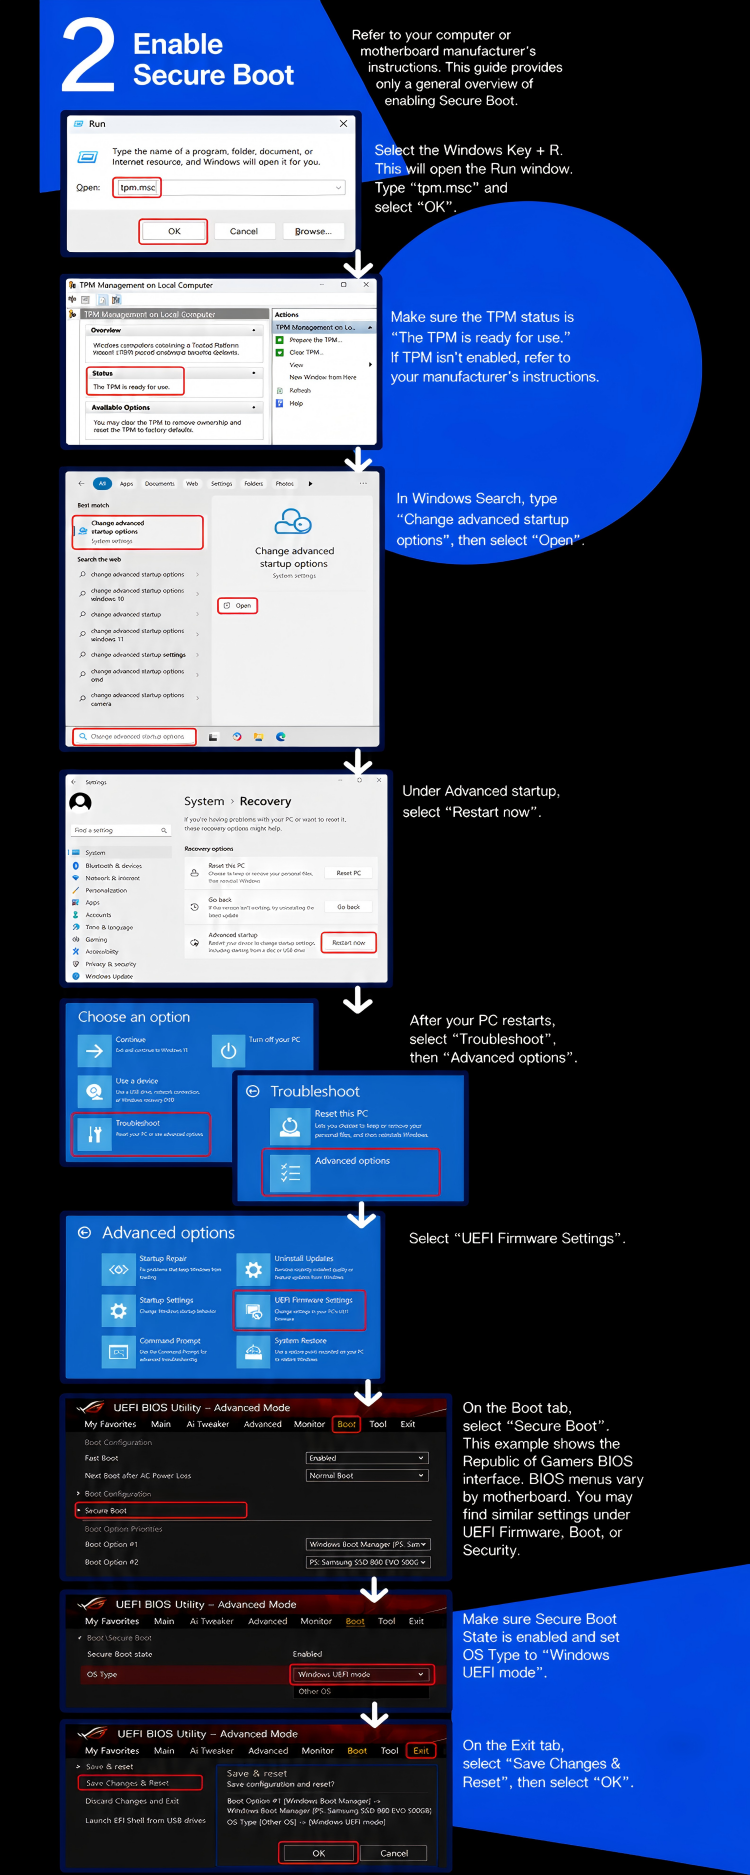
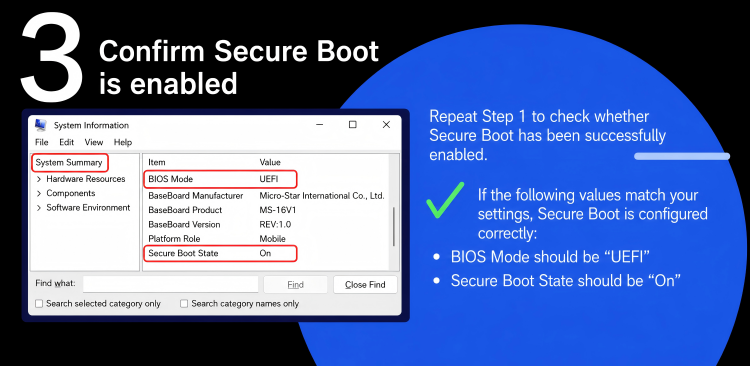
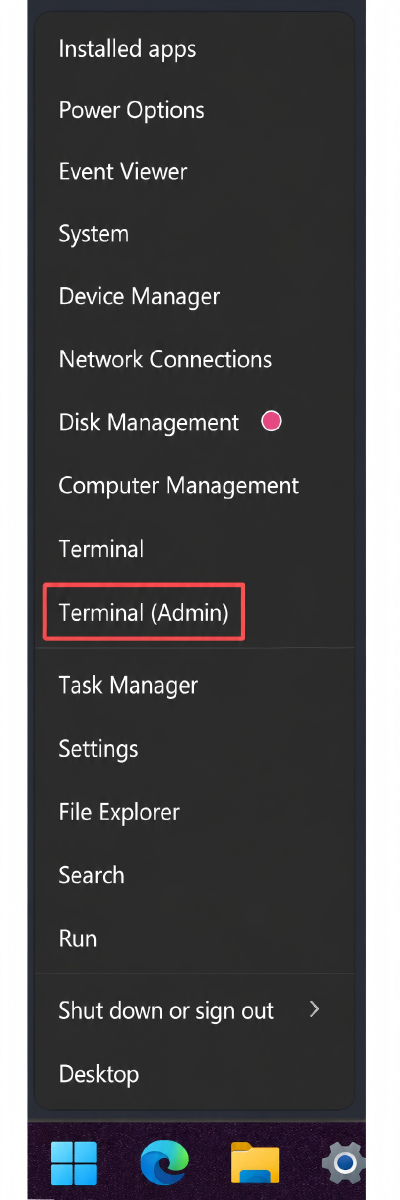
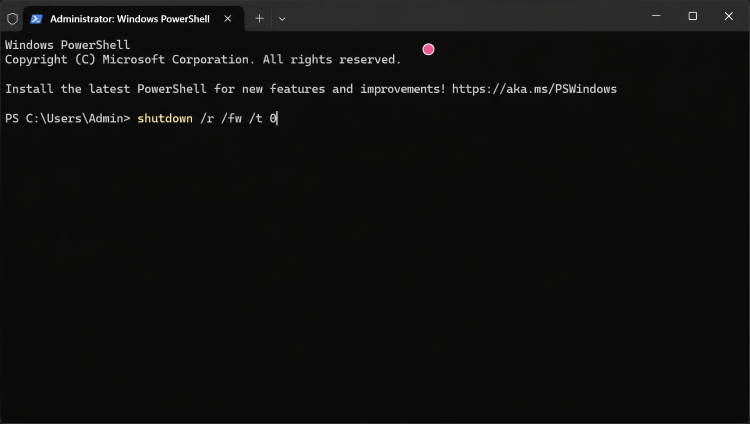
Quick way to enter the BIOS: Open Windows Terminal or Command Prompt (CMD) as an administrator, enter shutdown /r /fw /t 0, and press Enter. Your computer will immediately restart into the BIOS/UEFI firmware settings.
2. Below are Secure Boot tutorials for select brands.
Dell: Dell / Alienware – How to Enable Secure Boot
HP: HP – Secure Boot for Windows 11
Lenovo: Lenovo ThinkPad / ThinkCentre / ThinkStation – Enable Secure Boot
ASUS: ASUS / ROG – How to Enable or Disable Secure Boot
Acer Notebook: Acer Notebook – Enable or Disable Secure Boot
Acer Desktop: Acer Desktop – Enable or Disable Secure Boot
Microsoft Surface: Microsoft Surface – How to Use Surface UEFI
Universal method for Windows 11: Windows 11 and Secure Boot | Microsoft Support
3. Secure Boot is enabled in BIOS, but Windows cannot detect it or Secure Boot cannot be configured:
Solution 1:
Enter the BIOS and open the Secure Boot settings page. Look for an option containing “Reset,” “Restore,” and “Key,” such as “Restore Factory Keys” or “Load Factory Default Keys.” Restore the factory-default Secure Boot keys, save the changes, and restart your computer.
Solution 2:
① (Optional) Search for “win” in the BIOS, locate “Windows 10 WHQL Support,” enable it, and press F10 to save the changes and restart. This step ensures that UEFI mode is properly enabled; otherwise, UEFI may appear enabled without actually being active.
② (Important) After restarting, return to the Secure Boot settings page. Select “Secure Boot Mode,” change it to “Custom,” and then change it back to “Standard.”
③ Select “Secure Boot,” set it to “Enabled,” press F10 to save the changes, and restart your computer.